
The idea of venturing into icy water may seem totally daunting at first, but cold plunging offers a multitude of benefits, such as improved circulation and a strengthened immune system. If you want to try cold plunging for the first time, it is crucial that you proceed with caution. With the right preparation and mindfulness, you can achieve amazing positive body effects. Here are some valuable tips to help you prepare for your first cold plunge and a detailed step-by-step guide.
/contents
Table of Contents
1. Start Slowly With Alternating Cold Showers
If you have never immersed yourself in ice-cold water before, it is important to lower the cold plunge temperature gradually. Start with cool water and then gradually work your way up to colder temperatures to get your body used to ice bathing. The best way to do this is by taking cold showers. You can increase week by week and be ready for your first ice bath in about 1 month.
Here is a step-by-step plan to help you prepare for the cold plunge.
- Week 1: Alternating warm and cold showers
- Week 2: 15 seconds of cold shower
- Week 3: 30 seconds of cold shower
- Week 4: 45 seconds of cold shower
- Week 5: 60 seconds of cold shower
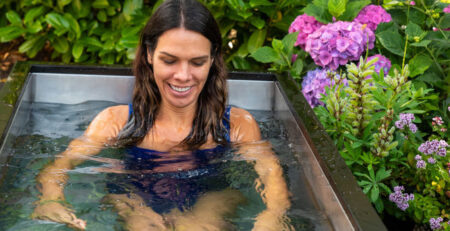
2. Choose a Comfortable Environment
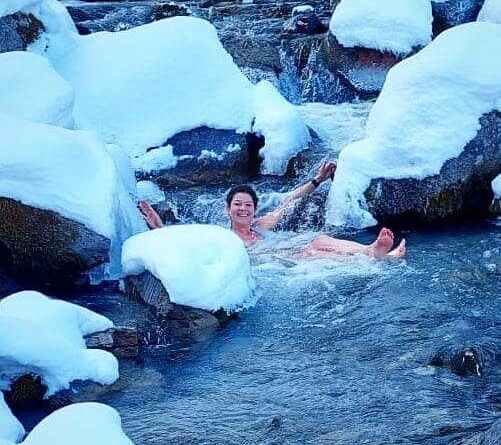
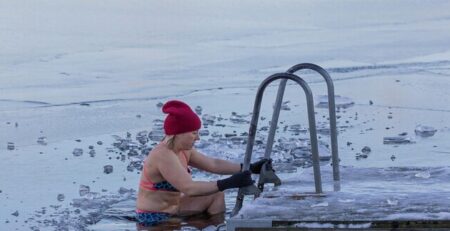
Make sure you find a safe place for your first cold plunge that has no obstacles and also allows you some privacy. Take all the time you need. You can either use one of our barrels or go into a lake with clear and clean water. It’s best not to choose a flowing body of water because then you also have to concentrate on the current and making sure you don’t drift off. Running water is also colder than stagnant water.
3. If you have the Opportunity, go with a Partner or Group
Cold plunging is always best together. But often that doesn’t work. The first time, however, it would at least make sense to have someone there to support you. Perhaps your spouse or children can help in case you feel unwell.
4. Overcome the Mental Barrier – Overcome Yourself Mentally
Cold plunging is not exactly known for its feel-good factor. That’s why many people say up front that they would never do it. However, they also never have the opportunity to experience the benefits first-hand, directly after a cold plunge. But anyone who has ever done it knows: it’s hard to get over, especially the first time. And this includes, above all, the mental effort. So you shouldn’t have too many reservations, just go for it. And it hurts at first. It’s a bit counterintuitive, but the pain and mental strain will help you to become stronger and more resilient.
5. Breathing and Relaxation
Many cold plungers swear by breathing techniques before the plunge. The right breathing technique for cold plunging can increase your body heat and prepare you well for exposure to the cold. The breathing techniques help you to ignite your ‘inner warmth’. Sit cross-legged on a yoga mat or lie down and practise methods such as Wim Hof breathing, Tummo, or Buteyko to help raise your body heat and calm your mind. Spend 5–15 minutes practicing before your plunge so that you feel warm going in, not shivering already.
6. Preparation Before Entering the Water
- Wear a swimsuit underneath your clothes so you don’t have to change outdoors, because changing outside in winter is quite uncomfortable.
- Lay out warm clothes in advance for after your plunge.
- Consider neoprene gloves or socks to protect hands and feet, as they get cold the fastest.
- Optional: measure the water temperature with a thermometer.
You can set up a thermometer and measure the temperature. These are usually the most affected by blood loss and start to freeze and hurt very quickly. We have great offers in our store for everything you need for your first cold plunge.
7. During Your First Cold Plunge
So now you’re in your swimming costume, it’s cold outside, and the ice water is in front of you. Your head is still saying: NO, DON’T DO IT!
Put on your neoprene gloves and neoprene socks and get into the ice bath tub. Start by immersing the lower half of your body in the ice-cold water and then quickly immerse yourself completely. You can start with just your armpits. Don’t look at your watch. Time doesn’t matter when you’re in the cold plunge.
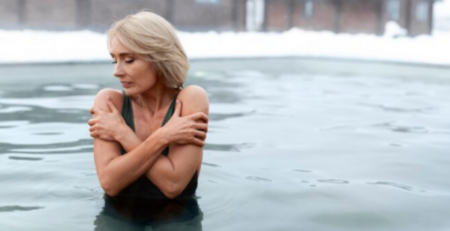
As soon as you are fully immersed, you will notice that your feet and hands start to ache. Your breathing is fast, and your heart is beating like crazy. That’s OK, let the cold happen, and most importantly: calm your breathing. Just breathe in and out slowly. You will notice that your body automatically relaxes. After about 30 seconds, you will notice that it is much better; it is still uncomfortable, but it is less bad than at the beginning.
1-3 minutes, that’s all it should be. Don’t overdo it, you still have plenty of time to practise!
! If you feel unwell, the pain is too strong, numbness occurs, you feel dizzy, or you start to shake very strongly and uncontrollably, then it’s time to get out!
8. After Your Cold Plunge
After you have enjoyed the cold plunge, it is important to warm your body up again carefully and slowly. There is no need to rush here, as it is even dangerous to get warm again too quickly. Your cold blood from the periphery must be slowly mixed with the warm blood again. You can therefore do the Horse Stance immediately after the cold plunge.
In the Horse Stance, you simply squat down so that your legs are slightly tense and move your arms alternately from side to side. You can also make noises as you do this. It’s a bit like the haka dance and warms you up well. You can also shadow box or walk – anything that involves movement is good. But don’t start moving too quickly, start slowly and then gradually move faster. Just like a cold car, you need to get it up to operating temperature before you go full throttle on the highway.

After 1-3 minutes of Horse Stance or other exercise, simply dry off quickly and put on as many clothes as you can. Follow the onion principle: a lot helps a lot, especially when there are many layers, which also makes you particularly warm. If you have tea or other warm drinks, this will certainly help afterwards.
You’ll notice that you’ll be freezing for quite a while. And also that if you go in without gloves or neoprene socks, your hands and feet can be very clammy. That’s not exactly helpful when getting dressed, but you have to get through it. And of course, it’s much easier if you’ve laid out all your clothes beforehand.
9 Consistency Is Key
As the saying goes: after the cold plunge is before the cold plunge. Repetition is essential. To wrap up the benefits of cold plunging: the more regularly you practice, the more your body adapts, and the stronger the positive effects will become.


Comments (2)
i HEARD a sweedish doctor saying that 10/15 minutes of cold water a week was ok.
What about 5 days a week, 8′ to 15′ (temperature 4° to 10°) during the whole winter.
I am 70 years old. This is my4th year of swiimming, reallly swimming, against the flow,some times strong.
I had no bad experience,except a hypothermie forstaying 30′ in a7° water, for a stupid reason (workstodo in the water, around may boat). And a heart wich seem irregular in the afterwards. But i am stupidly taking a hot shower after the bie plunge. I read wwhat u said:i should better do exercises in the first ime.
Thanks fora replys, it s quite vital for me and for reaasuring my family…. Thanks foru site, it s rich, full of enthusiasm( coNsequenceS fo all the oxytocinS ,endocanabinoide etc)
Greetings Jean François
I’d like to add that i did not go to a coma, in my hypothermic experience (T° around 31°). Was very stressing, dramatic in the first 30′ but after it was ok. But they sent me to the hospital to take care and make surveys.